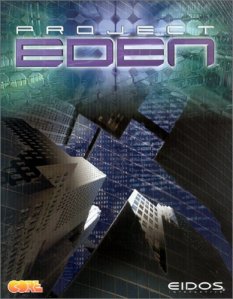
Genre: Action-adventure
Release Year: 2001
Developer: Core Design
Publisher: Eidos Interactive
Age Rating: 12+
Playability Status: Perfect
Tested On: Windows 10 x64
Availability: Copyright retained - Still sold
Don’t want the hassle?
 Get this game pre-patched, DRM free and ready to play from GoG.com. Fully working or your money back.
Project Eden, Core Design’s dystopian cyberpunk adventure, managed to fly under most gamers radars when it was released back in 2001. In the game, you take control of four UPA agents as they infiltrate the sinister sounding Death Heads criminal gang. Gameplay is focused around cooperative play and puzzle solving, rather than just pure gunplay. Project Eden may lack the fast action that third person action games are often known for but it more than makes up for this with some cleverly designed puzzles. More than a decade on, it remains an interesting title to revisit, especially if you can bring a friend along for the ride.
Installation
To install the game from the original retail CD, simply place the disc in your computers optical drive and then browse to the CD in Computer/This PC and run the “Setup.exe” file manually. The installer will ask you what type of installation you wish to perform. Choose “Custom”, then install every available option. Towards the end of the installation process you will be asked if you want to install DirectX 8 and Gamespy Arcade. You should decline both of these options. The version of DirectX on the game CD is outdated and Gamespy Arcade is a multiplayer service that’s now sadly defunct.
To install the GoG.com digital download version, simply download the installation file from your GoG.com game library and run it, following all on screen prompts.
Patching
Before you start the game, you should install the latest patch for the game. Patch 1.02 can be downloaded from PC Gaming Wiki here. The file is downloaded as a zip file, simply open the zip file then run the ProjectEdenPatch.exe file inside. The patching process should then be automatic, simply follow the on-screen prompts. Note that if you have installed the GoG.com version, this patch is already included and doesn’t need installing.
With the game installed and patched, you can start it from the Start menu or search bar by searching for “Project Eden” and clicking the icon that appears.
Tweaking visual quality
UPA agents should be aware that there are a number of settings you can tweak within the game so that you can get the best visual quality from the game. Start Project Eden and from the main menu choose “Configure” and then “Graphics”. The options shown below will then appear.
Many of the settings should automatically configure, but make sure the following settings are configured as shown below.
Colour Depth – High.
Screen Resolution – Set this to match your monitor. You can use 16:9 or 16:10 (widescreen) resolutions if you prefer.
Depth Quality – Z24 S8 Best.
Engine – Hardware.
Texture Detail – High.
Texture Filtering – Anisotropic.
Character Effects – High.
Aspect Ratio – This is an interesting one. You might be tempted to choose “16:9 Letterbox” or “Anamorphic”, but this isn’t the correct setting for widescreen. Instead, leave this setting at 4:3 to play in widescreen. The Letterbox and Anamorphic settings will stretch normally non-widescreen resolutions into widescreen. They are possibly left over from the Playstation 2 version, or for users who wanted to play in widescreen on low-end PCs back when the game was first released.
Tweaking audio quality
There are a handful of settings relating to audio quality within the game too. To access them, go to the games main menu and choose “Configure” and then “Sound”. The options shown below will then appear.
On this screen, make sure that “Output Sample Rate” is set to “44100 Hz” and “Software 3D Quality” and “Sample Quality” are both set to “High”. Project Eden uses the now defunct EAX hardware accelerated audio standard which unfortunately is unavailable on Windows Vista and later versions of Windows. If you’re lucky enough to have a Creative sound card, you can use ALchemy to restore hardware sound mixing and hardware reverb. To do this, simply exit the game and then add Project Eden using the ALchemy configuration tool (the games default installation directory is “C:\Program Files (x86)\Core Design\Project Eden\Eden.exe”). Once you’ve done this, start the game again and go back into the sound options. You should then be able to choose Hardware sound mixing and Reverb (Reverb Sound Card – Hardware). This may marginally increase sound quality over the standard software output.
With graphics and sound configured to their optimal settings, you can now start your adventure.
Multiplayer
Project Eden is even more fun when you can take a friend along to help control the games four characters. If you have two PCs and two copies of the game, it’s actually quite easy to play across your home network. You simply need to know your home PCs internal or local IP address. Follow this article to discover it.
Now, on your first PC, start the game and choose “Multiplayer” and then “Internet TCP/IP”. The options shown below will then appear.
Under “This Address” at the bottom of the options, make sure the number given matches your internal IP address. If it does not, click on “Next Address”. Once you have a match, click on “Accept”. This will create a game on your first PC.
You should now be able to go to another PC in your house and join the game by starting Project Eden on that PC, choosing “Multiplayer” and then simply clicking on the game in the list. If that doesn’t work, try clicking on “Connect Address” and typing in the IP address of your other PC (the one hosting the game) manually. If you still can’t join the game, try alt-tabbing out of the game (on both PCs) and checking that Windows Firewall is not asking for permission to connect.
It may also be possible to play over the internet using a tool such as Evolve, but we haven’t tested this.
Troubleshooting
Failed to start DirectInput (DirectX8) or find a DX8 compatible input devices – If you get this error message when trying to start the game, a simple reboot of your PC should cure it.
Problems saving games – Like many older games, Project Eden stores its save game files in its installation directory. If you installed the game into the program files or program files (x86) folders, you may find that the default Windows security settings prevent the game from saving any progress. To fix this problem, set the permissions on the SAVED GAMES sub-folder within the Project Eden game folder (C:\Program Files (x86)\Core Design\Project Eden by default) so that your user account has full control/read write permissions. You can find a tutorial on how to configure folder permissions here.
Screenshot


Leave a Reply